

Add us to your preferred sources.

In a previous article, we outlined how to create a basic table in Microsoft Word. Let’s move on to the next steps and see how we can format a table with a different style and also add more rows or columns.
Table Design and Layout Tabs
A key part of using tables in Word is the ability to customize them. A table is one of the functionalities that displays 2 new tabs on the ribbon. These new tabs, named Table Design and Layout, are only visible on the ribbon when the cursor is within the table area.
Many people find that these tabs disappear regularly, so it’s important to watch where you click your mouse. One click outside the table area and these two tabs will disappear.
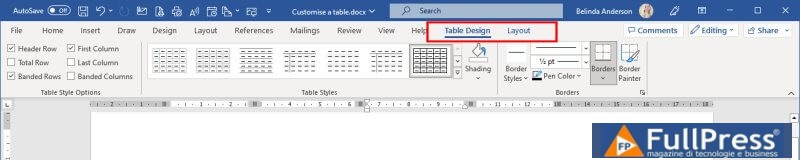
The Table Design tab contains all the settings you can adjust to make the table look the way you want. Things like table style, shading, and border settings can be customized in this tab.
The Layout tab contains everything related to the structure of the table. Here you can add new rows or columns, delete them, adjust sizing, evenly distribute rows and columns, adjust text alignment, and so on.
Insert or Delete Rows and Columns
Once you have included a table in your document, you will most likely want to add or remove rows and columns as needed. Perhaps you have additional data you want to include or you need to remove content you’ve already added.
Fortunately, there are many ways you can do this, so choose whichever is easiest to remember and follow.
Insert a New Column
- Open Microsoft Word
- Open a document that contains a basic table or follow the steps in the article to insert a basic table like the one below:
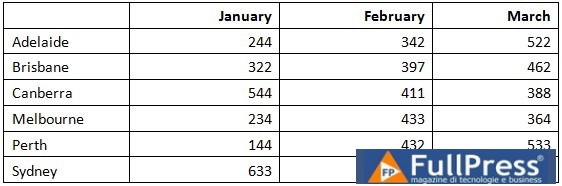
- Currently, my table has 4 columns and 7 rows. It also has borders displayed at the moment.
- We need to add some new columns so we can add data for April through June.
- Place your cursor anywhere in the last column (March)
- Click on the Layout tab from the ribbon
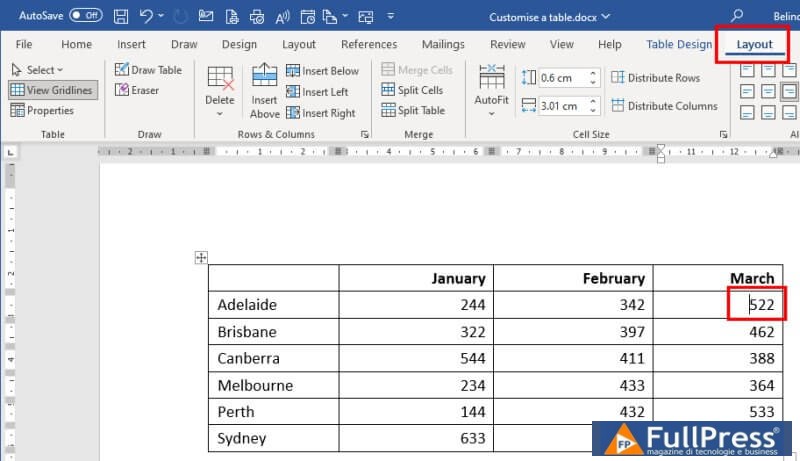
If you cannot see the Layout tab, make sure your cursor is inside the table area.
- From the Layout tab, click the Insert Right button to insert a new column to the right of your cursor. If you need to insert a new column to the left, click the Insert Left button.
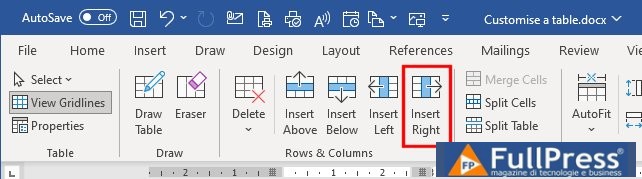
- A new blank column will appear on the right side of the table
- Another way to do this is without the need for the ribbon buttons. If you hover your mouse cursor at the beginning of any row or column dividing line, as shown below with the red crosshair, you will see the + icon appear. Click this icon to automatically add a new column or row.
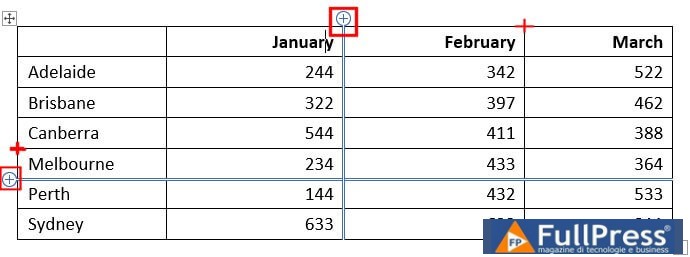
- Just when you think there are no more options possible, you can also use the good old right-click of the mouse to add new rows or columns. Right-click on any row or column, then choose Insert from the menu.
Insert a New Row
- Place your cursor in the row where you wish to insert a new row
- From the Layout tab on the ribbon, click the Insert Above or Insert Below button
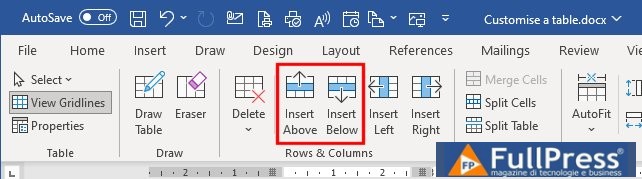
- A new row will be inserted
TIP: if you just need to add new rows at the bottom of the table, don’t bother going through the process above. Instead, use the TAB key on your keyboard. Click in the last row and keep pressing TAB on your keyboard to move to each cell, when you get to the last cell, click TAB again and a new row will be automatically created.
Resize a Row or Column
When it comes to resizing a row or column, you again have several ways to do this. You can use the mouse to directly move the borders of the row or column to increase or decrease the size, or you can use a more accurate approach and specify the exact size you want to use. Let’s give it a try.
- Click in one of the columns
- Hover your mouse over the right border so that the cursor changes to the cursor below

- Click your cursor down and drag to the left or right depending on whether you want to increase or decrease the column width
- Release your mouse when you are finished.
- Repeat the process but this time with a row
- Hover your mouse over the bottom border so that the cursor changes again

- Click and drag your mouse to increase or decrease the size
- The other alternative, especially if you want the row or column to be a specific size, is to use the Size fields available on the ribbon.
- Click in the column or row you want to resize, then select the Layout tab from the ribbon
- Use the Height and Width fields to adjust the size accordingly:
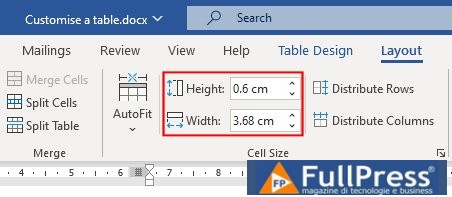
- Your row or column will now be resized as you adjust the settings.
Apply a Table Style
A really quick way to format your table and make it “pretty” is to use the built-in table styles. Let’s take a look at how to apply and customize them.
- Place your cursor within the table area
- Click on the Table Design tab from the ribbon
- You will see the Table Styles gallery displayed

- You will see basic table styles displayed, click on the down arrow on the right side to open all the options in the gallery
- You will see that the gallery has many colorful options to choose from. Hover over an option and you will see a live preview of the style applied to your table data
- When you are happy with one, go ahead and click on a style to apply it to your table.
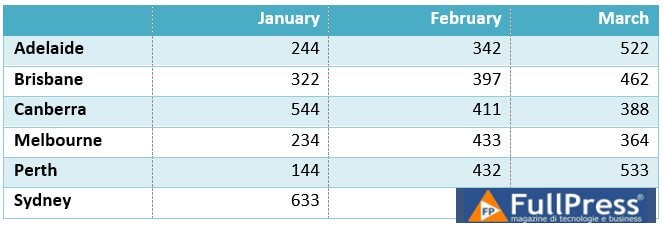
- Now that you have applied a style, you can adjust the style options using the checkboxes in the Table Design tab.
- You will see that the style I have chosen has the top row of my table highlighted. If I don’t want that style, I can uncheck the Header row style option.
- My table also has banded rows, every second row is shaded. If I don’t want that, I can uncheck the Banded Rows option.
- Some options when you adjust them may not have any effect on your table style based solely on the style you chose in the first place.
You have now created a table and have been able to add and remove rows and columns, resize those rows and columns, and apply a table style.
Pubblicato in Word & PowerPoint
Be the first to comment