
Here is a tutorial based on how to create an invoice simply using Word, where data entry is guided, minimizing the possibility of errors.

Add us to your preferred sources.

Here is a tutorial based on how to create an invoice simply using Word, where data entry is guided, minimizing the possibility of errors.
Haste is one of the main enemies of work done with the right criteria: for this reason, we will try to help those who risk, constantly interrupted in their work by the phone, clients, and suppliers, from making mistakes when filling out their invoices. We will see how to create a fillable form on screen with fields capable of recognizing the type of data entered and, in case of error, also “able to protest” visually to the careless typist.

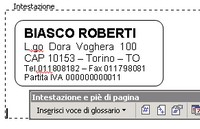
As a first step, let’s create the invoice header, containing the company’s data and its logo. Word headers are accessible from the View menu, selecting Header and Footer. A simple way to create “tags” with company data is to choose a shape from the drawing toolbar. Inserting the logo is also simple, acting from the Insert/Image menu, provided you have the appropriate image.
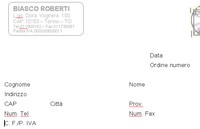
Let’s continue building our invoice by inserting labels related to customer data, similar to the corresponding image. We can see that we will need a date-type field, one numeric-type, while for all other fields, we will use a text format, including the ZIP code, which only apparently is a number. In fact, only fields on which mathematical operations can be performed are considered numeric.
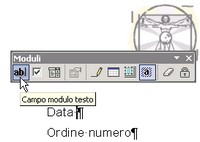
We call up the Forms toolbar from the View menu, then position ourselves, inserting a space, to the left of the “Date” label and click the Text Form Field button (the first on the left) to insert the first field. The introduction of the field will be noticeable by the presence of a gray “halo.” This ability to detect the field’s presence through the gray background can be disabled (not recommended) by the Form Field Shading button.
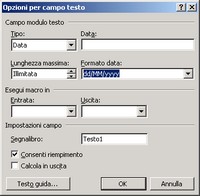
Now right-click the field and from the context menu choose Properties to launch the Text Form Field Options dialog box. Immediately set the data type to Date, since only dates will be entered in the field. Also adjust the date format from Date Format, then confirm by clicking OK. Finally, to verify the field’s functionality, click the Protect Form button in the Forms toolbar.
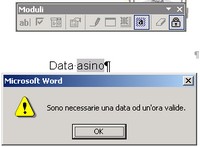
Enter a date correctly, for example 10/02/2004, and confirm by pressing the TAB key. Attention! Do not use the ENTER key to confirm. If you try to enter a full date such as 10 February 2004, after TAB Word will automatically convert it into the short format we set. However, if you try to enter arbitrary text, say donkey, our form will reject the erroneous input attempt with a warning popup.
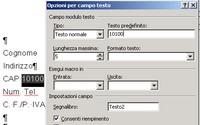
Following the above methods, move on to entering the field related to the ZIP code. It is advisable to remove the form protection first by clicking the Protect Form button. Again call up the Field Properties, leaving the data type as Regular Text, but placing a limit on the maximum number of characters, which will be five. If a recurring value is expected, you can set a default text, for example, 10100.
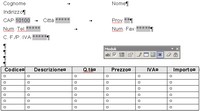
After finishing entering the personal data fields, still using the Forms toolbar, add a table composed of six columns and seven rows (or even more). Define the first row as the header of the columns with the following labels: Code, Description, Q.ty, Price, VAT, and Amount. Within each cell under the headers, we must add a field, excluding the last column which should contain a calculated field.
For our study, the three numeric fields Q.ty, Price, and VAT are particularly interesting. Let’s start by defining the Properties of Quantity. Obviously, the data type will be numeric, but less intuitive is how to define the maximum value. In Maximum Length, change Unlimited to three, which means: do not allow more than three digits, thus a maximum value of 999. For Price, it will be important to define the Format, that is, with two decimals.
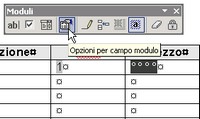
Illustrative to understand the dynamics of the fields is the setting of VAT. Given the Number type, knowing that VAT is generally 20%, which arithmetically corresponds to 0.20, we could set the length to one character with two decimal digits format. However, since we are used to the classic 20% representation, we will set the format to %. This change will require shifting the length from one to three characters: two digits plus the % symbol.
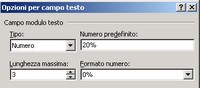
Let’s move on to the Amount field, where we need to calculate, based on the number of pieces and the unit price, the related cost. To simplify the calculation at the moment, we will not consider the VAT field. In the Amount cell, insert a field, setting the type to Calculation. In the Calculation box, set the multiplication between the Quantity field and the Cost field. To let the calculated field know the objects of the calculation, we must use Bookmarks.
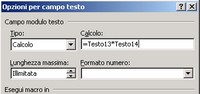
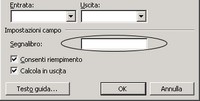
A bookmark identifies a position, a portion of text, or a field, assigned a name and used for future references. In our case, bookmarks have already been assigned. Looking at the Text Form Field Options (the small window accessible through field Properties) for the Price field, we can see among the field settings the bookmark name, Text14 in our case. Similarly, the Quantity field is called Text13.
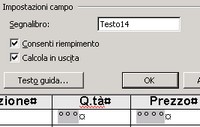
Having collected the necessary information to define the calculated field (=Text13*Text14), we can prepare the other records (rows). Fortunately, there is no need to enter all fields from scratch or define all Properties; just select the row with the fields, copy it to the clipboard using CTRL+C, and paste it into the next row using CTRL+V. Repeat this operation for all rows in the table.
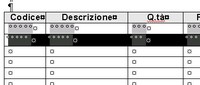
The only drawback of this copy-paste method for rows is that the new fields do not have bookmarks, and the respective calculated fields continue to compute the product of the first row. Be patient; check the name of the last bookmark corresponding to the Amount field of the first row and manually add the names of the new bookmarks, avoiding duplicate names. Also, rewrite the formulas of the calculated fields.
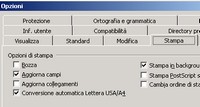
This type of calculation structure, particularly for those used to a spreadsheet, presents some limitation in automatic updating ability. To ensure the fields update every time you print the invoice, call the Options dialog from the Tools menu, go to the Print tab, and then in Print Options check Update fields.
Be the first to comment