
All the tricks to best optimize graphic files for publishing on the Internet. Format by format, techniques to compress images to the maximum without damaging them.

Add us to your preferred sources.

All the tricks to best optimize graphic files for publishing on the Internet. Format by format, the techniques to compress images to the maximum without ruining them.
Thanks to Adobe Photoshop CS, it is possible to very quickly export any type of image for publishing on the Internet. The two fastest methods are: using the Image Ready software, included with Adobe Photoshop CS, or—once the image processing is done—saving via File > Save for Web.

Leaving the use of Image Ready to those who want to experiment with the application or delve into technical saving tricks, let’s try to use the second method, which is more accessible and immediate. Once the function is called, as indicated in the previous point, a preview window will appear allowing you to evaluate step by step the graphic impact obtained.
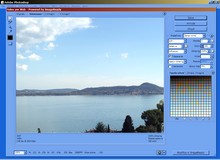
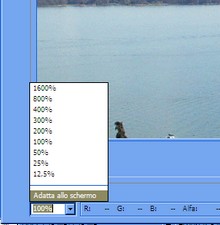
To view the entire image you can use the Zoom Level menu located at the bottom left, selecting the Fit to Screen option from the dropdown menu. If instead you want to keep the larger dimensions, it is possible to move the image to check hidden parts using the Hand Tool (also accessible with the H key).
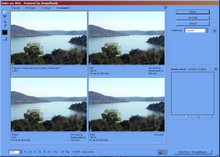
A second option to see the changes made in real time is to display the original image side by side with the optimized one. In the tabs above the image, select the 2 images option. On one side the original will be shown, on the other the result. If desired, you can also compare 4 images to try out different saving methods.
Let’s move on to optimization. The most used formats on the Internet are .GIF, .JPG, and .PNG (both eight and twenty-four bit). These types of images can be selected in the dropdown menu on the right, under the Default option. For each, further specifications must be set concerning the color palette, compression, dithering, etc.
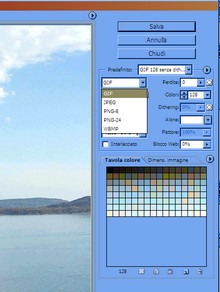
Let’s try setting the image as .GIF. This format is 8 bit and allows a maximum of 256 colors. Using the Colors menu, you can reduce the number of colors to lighten the file size in Kbytes. Checking the image alteration on the side, it is advisable to stop the reduction if halos are created or the photo’s grain visibly deteriorates.
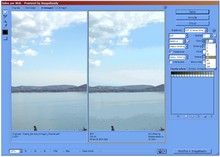
Another parameter to set is dithering. This system simulates the image colors for 8-bit display. It can be excluded (No dithering) or used to create Diffusion, Pattern, or Noise effects. Dithering does not affect the color palette but increases the image size. Of the three effects, Diffusion is the lightest.
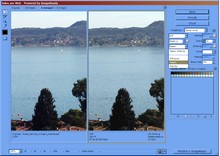
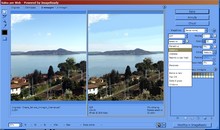
Another algorithm to define concerns color reduction. It partly overlaps with the earlier choice of the number of colors but also adds new possibilities. The options are Perceptual, Selective, Adaptive, and Restrictive (with standard Web palettes). Except for the last one, the others target the optimized image using colors from the original.
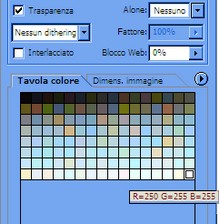
Finally, an important aspect of .GIFs is transparency. You can choose a color from the palette to make invisible to lighten the entire image. Obviously, it must match the Web page background. To achieve this, just check Transparency and click with the mouse on a color in the palette that will be highlighted.
Moving on to saving as .JPG. Selecting .JPG from the Optimized file format dropdown menu brings up new formatting options. The most important is Quality, which indicates the image compression level. Moving the slider on the small bar accessed from the tab next to Quality, you choose the percentage level of file compression.
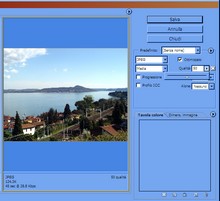
Alternatively, you can select the compression type faster using the Compression Quality dropdown menu, which offers standard values Low, Medium, High, Very High, Maximum. To further reduce file size, you can also opt for a blur (Blur tool), but use it only if it doesn’t spoil the overall graphic impact.
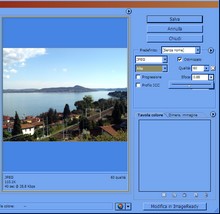
Now moving on to saving as .PNG, one possibility must be immediately excluded—too heavy in Kbytes: the 24-bit .PNG format. Although it maintains good resolution and a wide color palette, it also keeps a very large file. It is therefore preferable to always use the .PNG-8 format, which has the same characteristics as .GIF files.
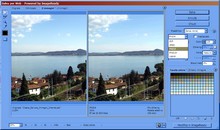
After reviewing the most important options, you can see how to use a quick choice menu that summarizes everything experienced so far. Next to the Default option, a dropdown menu can be called up listing about ten items. Choosing one of these will automatically apply a known combination of parameters.
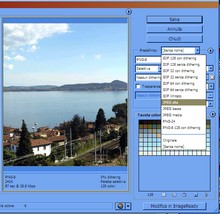
At the end of this process, which will be the best optimization? There is no single answer. It depends on the image type. To understand, you can opt for a comparative display (4 images option in the upper tabs) applying different formatting to each preview. At the bottom, the Kbyte values of individual photos are shown.
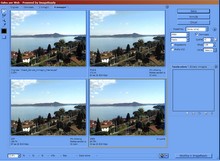
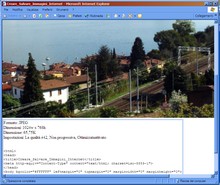
Once you understand which format is best to use, all that remains is to save with the Save button. Alternatively, to refine the formatting, you can call the Image Ready application via the lower Edit in Image Ready button. Finally, if you want to see a preview in the browser to evaluate quality and size, you can select Preview in default browser.
Be the first to comment