
How to create a custom resume from scratch using Word’s automation features and a few other tips.

Add us to your preferred sources.

How to create a personalized resume from scratch, leveraging Word’s automation and a few other tips.
Word includes several pre-set resume types. However, if we want to make a good impression, it might be best to create something that, while not necessarily original and creative, is not the obvious result of a document generated automatically in a few seconds. Let’s start by creating a new blank document.

The first thing to do is, of course, to focus on the content. Let’s write our resume without worrying about the formatting for now. Let’s enter the title, personal details, education, professional skills, work experience, etc., and anything else we think our interviewer should know.
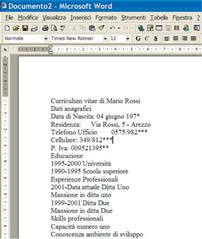
Once we have entered all the necessary information, we proceed with text formatting (the data shown in the figure are fictitious, purely for example purposes). Let’s start by adjusting the title. Triple-click the text to select the entire paragraph, and from the “Format” menu, select the “Character.
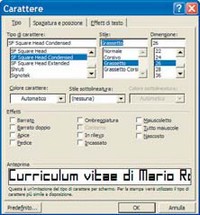 ”
”
In this window, we’ll set a font that we think suits the style in which we want to present ourselves, select a suitable size for a title, and click OK. Now, let’s select “First e Name” and further enlarge the text body for these two words using the dropdown menu in the toolbar.
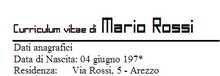
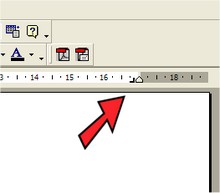
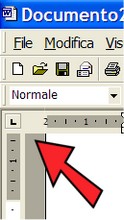
Now, let’s click in the top-left corner where the two rulers intersect: there’s a small square with symbols that change when we click on it. Click until a symbol resembling an inverted L appears. Once that’s done, click on the ruler, near the point indicating the right indent margin. At this point, the same inverted L symbol should appear on the ruler.
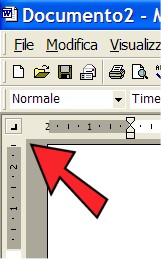
What we’ve created is a right tab; this means that pressing the TAB key will align everything to its right to the left of this symbol. Let’s do it now: position the cursor before the name and press TAB (the key to the left of the Caps Lock key).
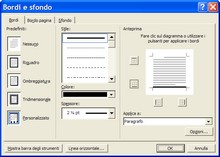
Triple-click the paragraph again to select it all, and from the Format menu, select Borders and Shading. Let’s set only the bottom border: to do this, simply click in the preview box of the dialog window shown in the figure and activate only the bottom side. Select the black color, set a thickness of 2 Pixels, and press OK.
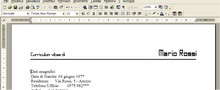
What you see in the image is the result of these operations: one part of the text positioned on the right and the other on the left. We will follow the same procedure later to format the section titles of our resume as well. First, however, it’s necessary to set the font for the rest of the text: this way, we won’t have to repeat the operation for each section.
Let’s select all the text this way: position the cursor at the beginning of the resume body, press the “SHIFT e ” and “CTRL” keys, and simultaneously press the “END” button. From the “Format” menu, select “Character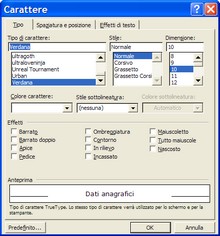 ” and set its content as you see fit.
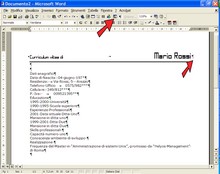
It’s time to format the other section titles as well. Let’s proceed with this method: activate the tool, indicated by the arrow in the image, which enables the display of punctuation marks. Move the cursor to the right corner of the paragraph line which has already been formatted, and select the inverted P that marks its end.
From the “Edit” menu, select “: this very simple operation copied all the paragraph customizations we had given to the title into the clipboard. Now let’s move to the section titles and select the various paragraph symbols. Now, simply press the key combination CTRL+V to automatically copy the paragraph characteristics.
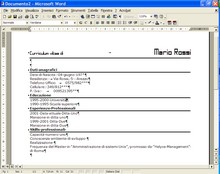
Now let’s format the rest of the data. Let’s start with the personal details section. Select everything and click in the corner between the rulers, which, as we have already seen, defines the tab settings. This time, click until the L-shaped left tab symbol appears, and insert it by clicking where the horizontal ruler marks eight.
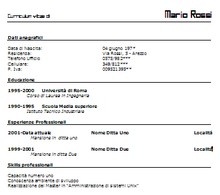
Place the cursor after the colon and press the TAB key to make the entered data align with the tab mark. Repeat this operation on each line. At this point, our work should look roughly the same as the example shown in the image.
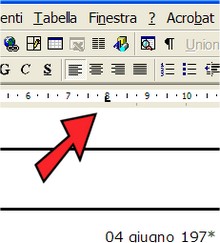
In the Education section, we need to do more or less the same operation: select all the text and insert two tab marks on the ruler, the first at 1.5 and the second at 3. Position the school name with the TAB key at point 3, making the paragraph bold, and move the obtained qualification on the line below, aligning it to the first tab.
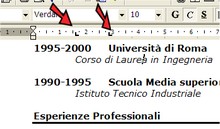
Finally, let’s set the tabulations for the Experience section. Select everything and set a left tab at point 2, one at point 7, and a right tab at the outer right margin. Align the text to the tabs until you achieve a layout like in the figure.
Be the first to comment