
An alternative method to the lasso tool for cutting out the silhouette of a person or an irregular object with strong contrast against the background.

Add us to your preferred sources.

The operation of cutting out images is quite often requested from those who edit photographs, brochures, or create posters.
There are many methods to perform it: we present a simple one and a very complex but faster one. Let’s start with the first. It is based on the Lasso Tool, selectable from the Tools palette or by keyboard, with the L key.

With the lasso, you can gradually cut out an image. Holding down the ALT key, you move the cursor around the figure. Each time you encounter a curve or an edge, you click to create a broken line that follows as precisely as possible the linear path of the contour to be traced.
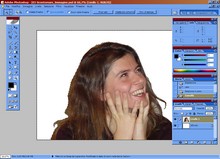
The result is an irregular selection that surrounds the figure to be cut out. Choosing Select > Inverse highlights the area outside the figure. This area is to be deleted. Pressing the DEL key will erase this area. The cut-out figure that results seems slightly flattened: this means this method is mostly recommended for regular or geometric images.
There is also another, faster system that allows for more precise results and a less “haircut sharp” effect. It is based on channels, uses masks, and exploits differences in color range. By using the Channels palette, or pressing CTRL + 1, CTRL + 2, or CTRL + 3, you can find the color channel where the figure is most contrasted.
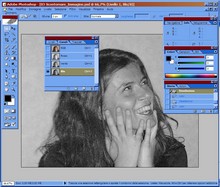
Obviously, for this method to be applied, the image must be at least 24-bit color, in RGB. In our example, the best channel to work on for the cut-out is the BLUE, where the shape of the person is most contrasted and suitable for creating a mask. Now I select all, using the Rectangular Marquee Tool or pressing CTRL + A.
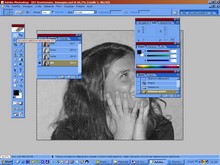
Now the selection must be copied, with Edit > Copy (or simply CTRL + C). At this point, it is necessary to create a mask. You move back to the composite channel (the one with all colors) using CTRL + ‘, and choose the Edit in Quick Mask Mode function (also callable with the Q key) in the Tools palette.
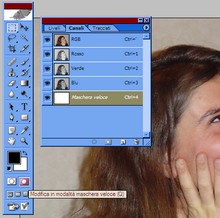
You will notice that an additional channel has been created in the Channels palette, associated with the CTRL + 4 combination. You must paste the previously copied selection onto it. The figure will turn reddish. Then, only this channel should be kept visible by deselecting the visibility of the others (clicking the eye icon, the visibility symbol).
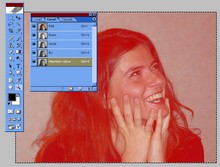
Now it is necessary to create a black mask of the represented figure. Take the Brush tool. In the options for this tool, select Burn Color for the Mode and a very large Master Diameter for the Brush. Then choose black in the Colors palette, setting a color percentage between 30% and 50%.
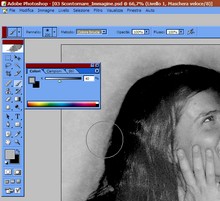
At this point, follow the contour of the figure with the brush to highlight the silhouette. Finally, increase the contrast using the Brightness and Contrast functions found via Image > Adjustments > Brightness and Contrast. Set a brightness value of 25 and contrast of 50. The mask begins to take shape.
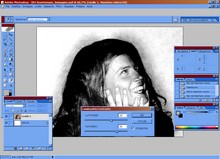
Now exclude the visible parts inside the figure. With the Lasso tool, create (as in step 2) a very quick outline of the internal area containing the details. Setting the background color as black, erase the just created selection. The result is a figure in complete “shadow,” usable just like a mask.
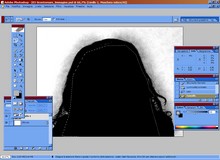
Now reactivate all channels. You will notice (compared to the image at point 7) that in the composite channel the figure’s silhouette is much more visible. At this point, position yourself on the composite channel and exit quick mask mode by clicking, in the Tools palette, Edit in Standard Mode, or simply by pressing Q on the keyboard.
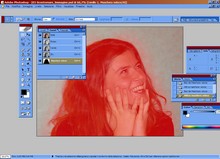
What results is a very jagged outline around the figure. You can now set a white background color and delete from the keyboard, using the DEL key, everything surrounding the selection. Only the image you wanted to cut out will remain in the foreground. You will notice that the shadow of the image also remains in the cut-out.
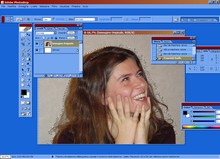
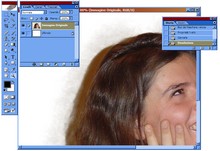
If you look carefully at the figure’s hair, you will notice that the shading has been kept intact. That is, the effect generated by the simple lasso was avoided, namely a clean scissor cut that flattens the silhouette and eliminates every shadow, shading, and irregularity, which are instead essential to give naturalness, especially to portraits.
To understand which channel is best to perform this second cutting-out method, let’s try applying the same technique to the other two channels, red and green, maybe changing the brightness and contrast levels. Here is the result, with all three images side by side. The best seems to be the one done on the BLUE channel.
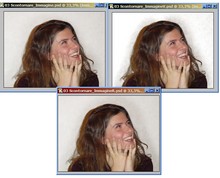
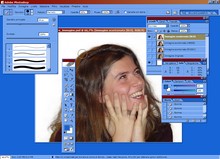
One last touch to the image is the removal of those black shades surrounding the figure. For this, just take the Eraser tool from the Tools palette (or by keyboard: key E). Choosing the appropriate Master Diameter and Brush Opacity in the options, proceed to erase the distracting pixels.
Be the first to comment